

Integrate ORCID
Interfolio is an ORCID Member Organization, supporting ORCID’s mission to connect research contributions with individuals through unique ORCID IDs. ORCID records can include research, work experience, education, scholarly works, grants, and more.
While the ORCID integration is accessed from the Legacy Vitas area of Faculty Activity Reporting (FAR), it is not limited to Legacy Vita users. Once connected, ORCID data syncs directly with key Profile and Activities sections used by both Legacy and Modern Vita builders.
To use the integration, faculty must create an ORCID ID in the ORCID system and grant FAR permission via OAuth to import and export data. After authorization, faculty can update their FAR records directly from their ORCID profile, allowing scholarly works and related activity data to be maintained in a single, consolidated source and reused across either vita format.
ORCID API Pre-Requisites
- The institution must be an ORCID member.
- The faculty member must have a personal ORCID account. Register here.
- The faculty member must grant access to their ORCID account.
Institutions interested in the ORCID integration should email Interfolio-support@elsevier.com, after which Interfolio will confirm data mapping.
Grant FAR ORCID Access
- Navigate to Vitas & Biosketches > Legacy Vitas on the navigation menu. Then scroll down and click the Create or Connect your ORCID ID button under the Authorize Access column in the Vita/Profile Systems section.
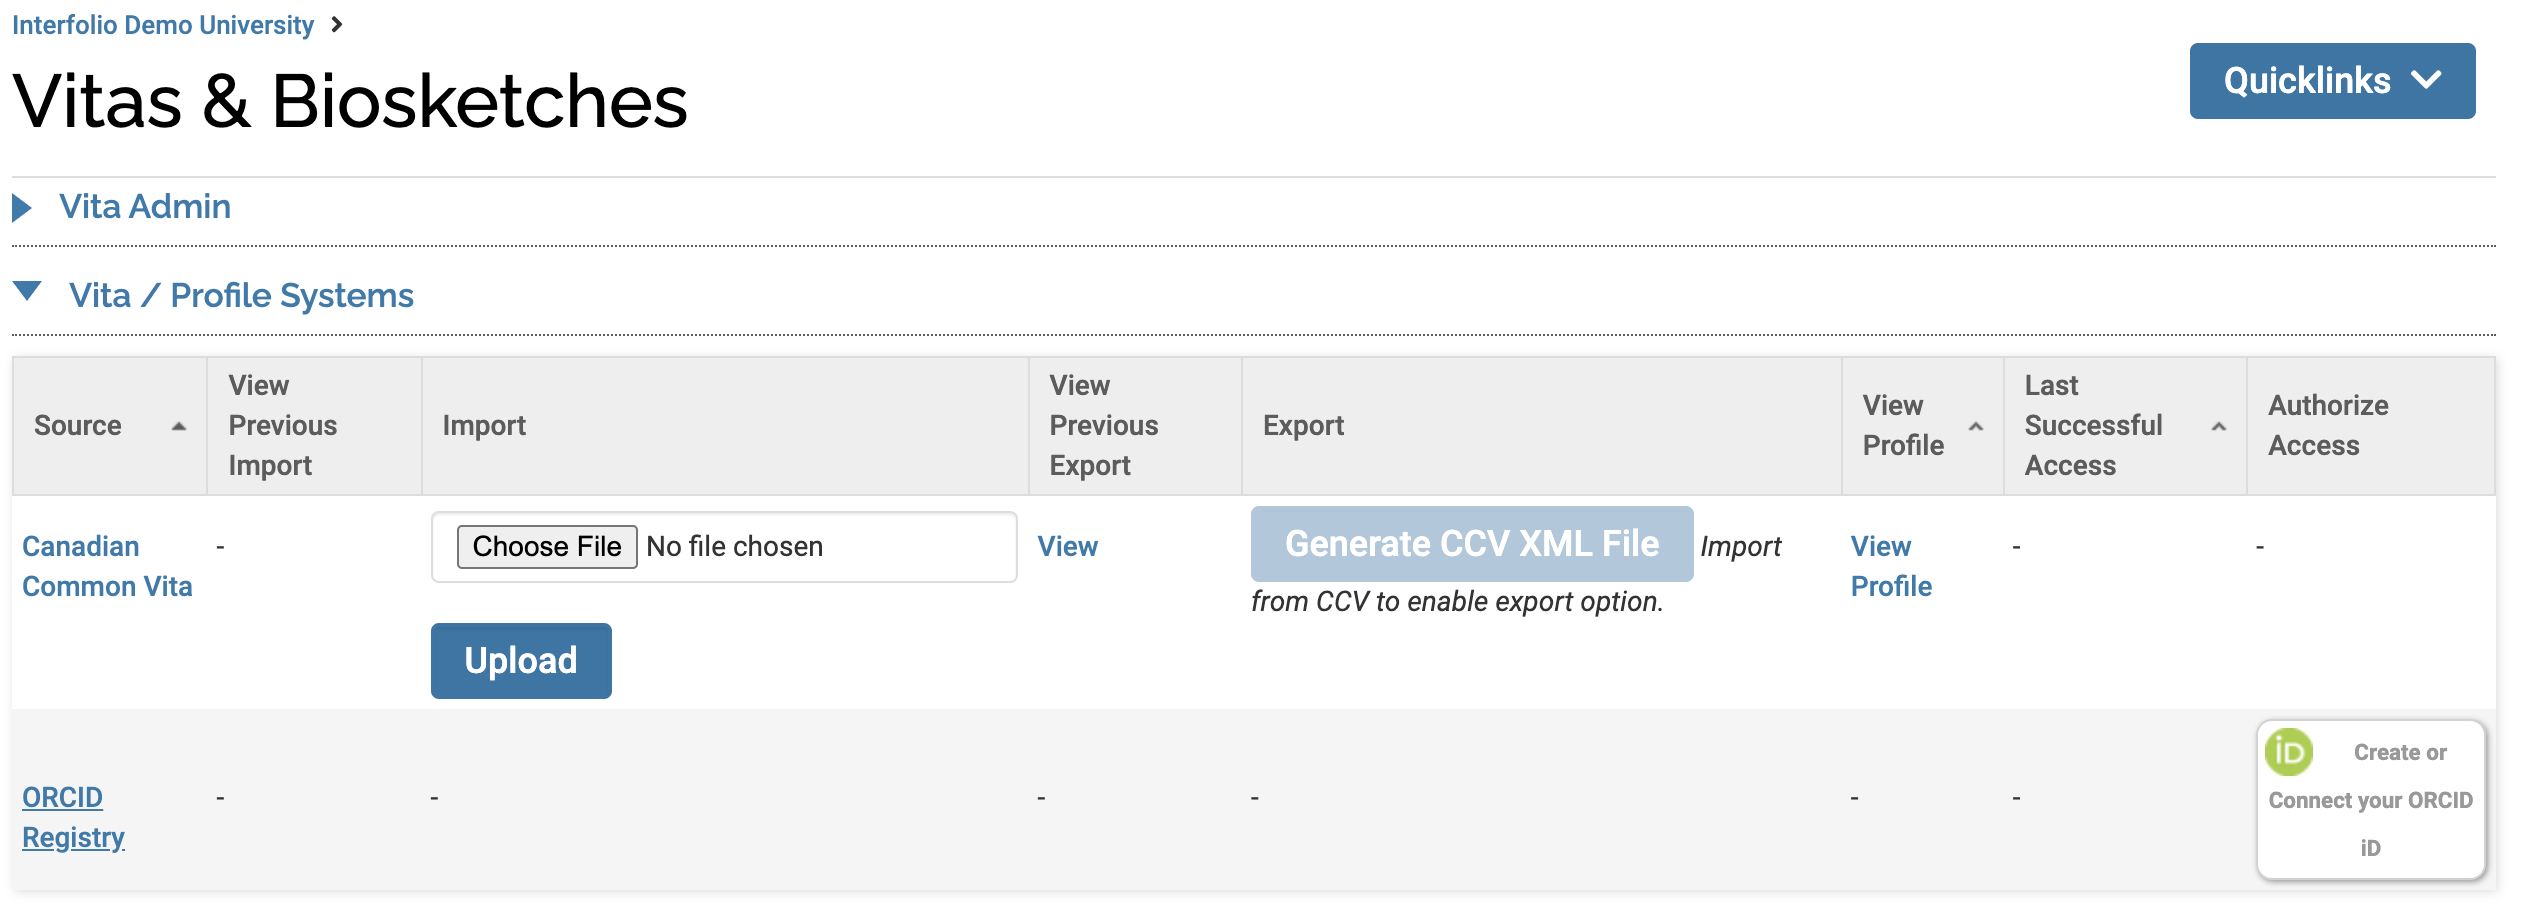
- Click the ORCID Registry link in the Source column to visit the ORCID homepage for more information.
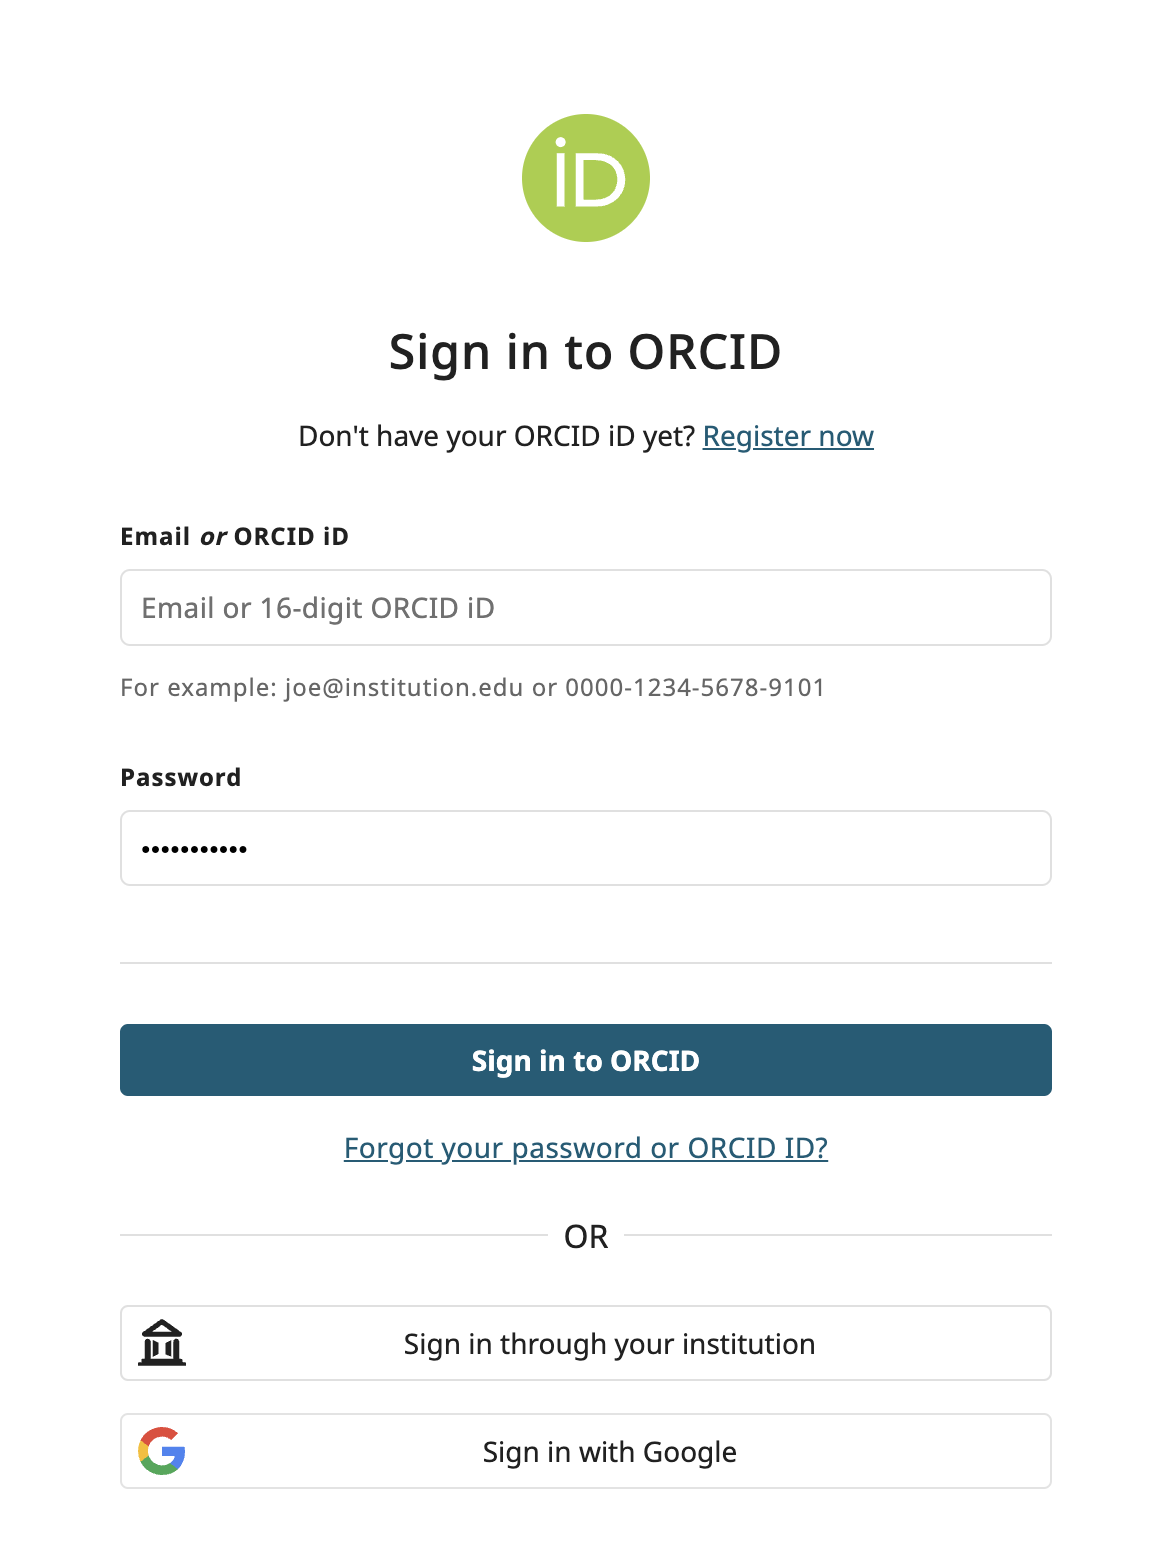
- To grant FAR access to your ORCID account, Sign in to ORCID or Register Now on the page that displays.
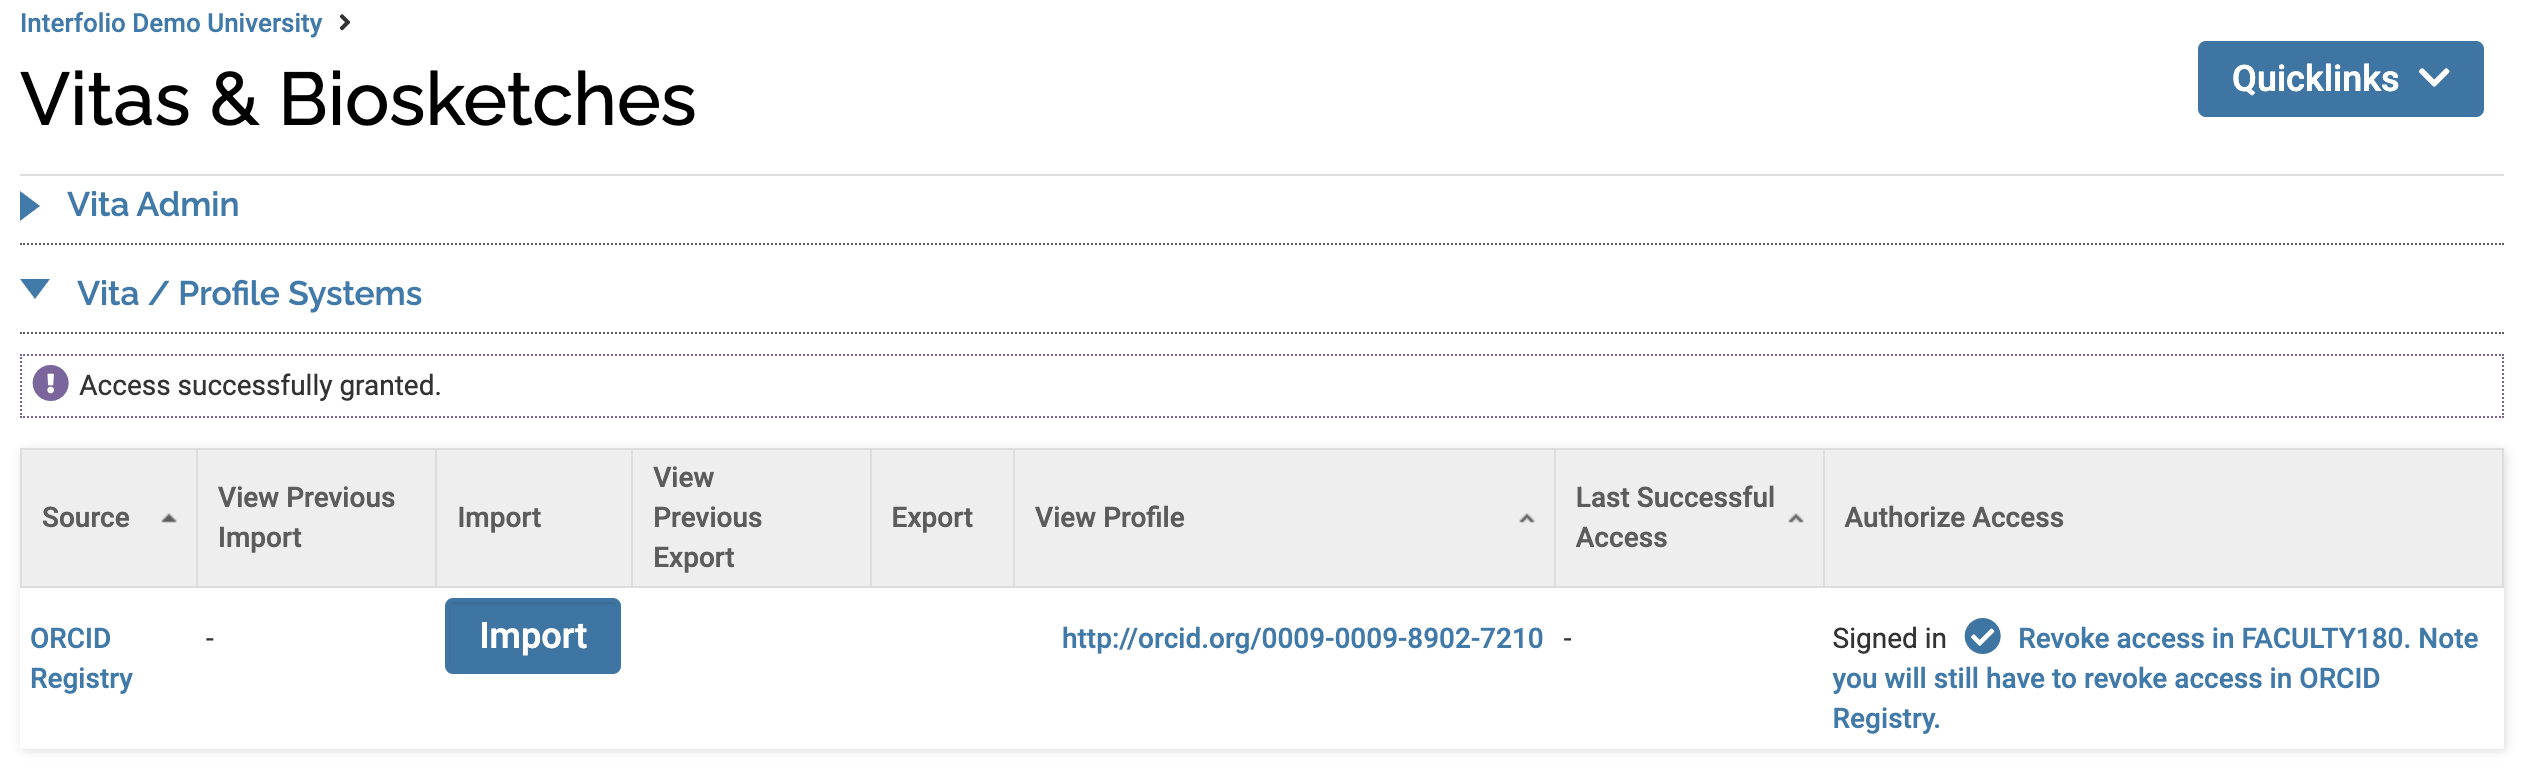
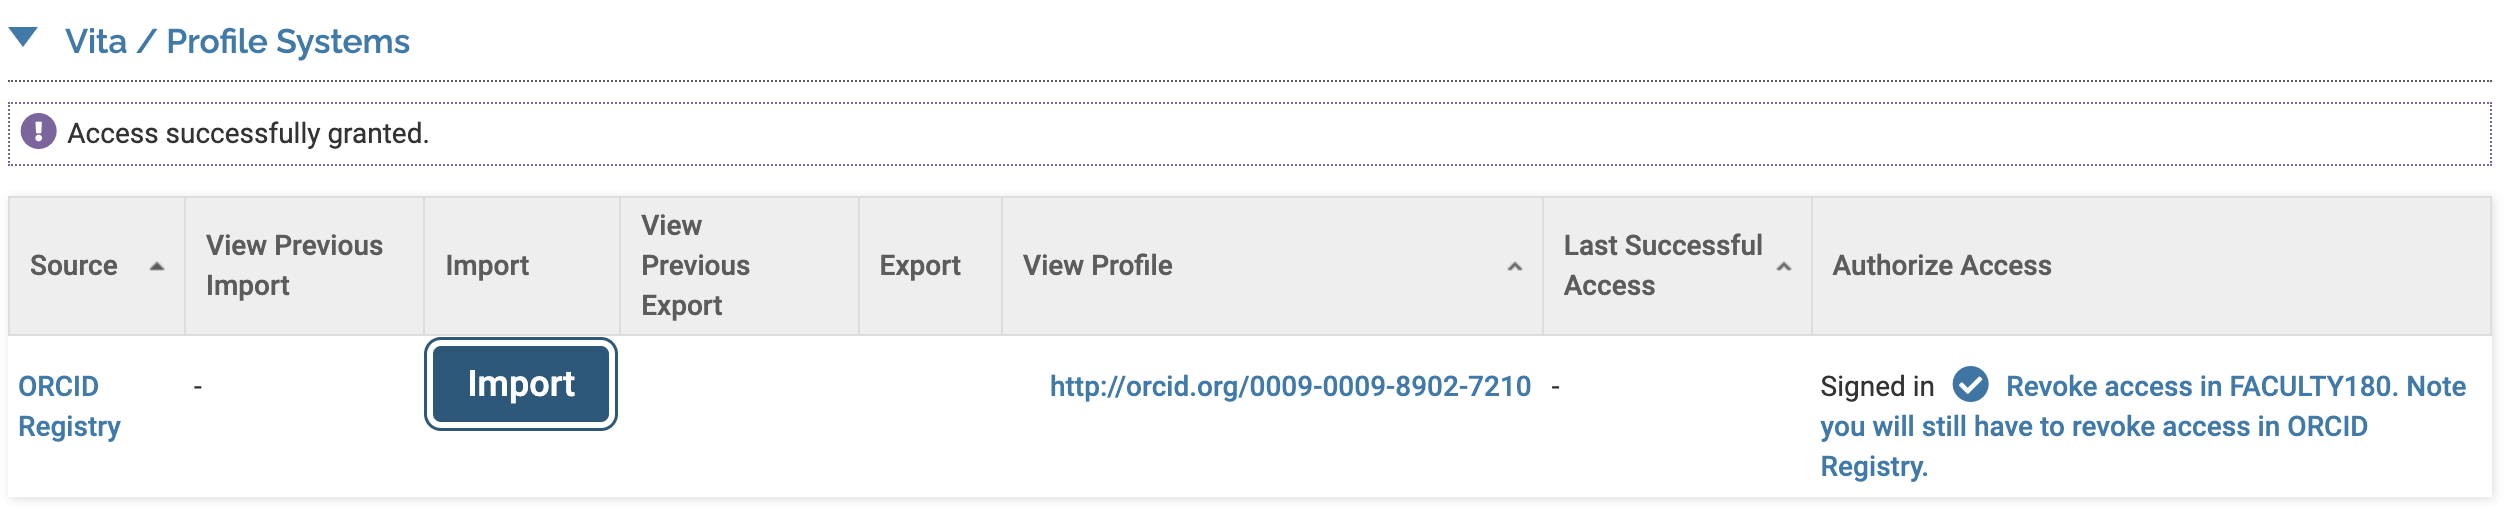
- After you Authorize Access on the next screen, you will be automatically redirected back to FAR. There, you will see a message confirming that access has been successfully granted, along with a hyperlinked ORCID URL in the View Profile column.
Revoke Access
Access must be revoked within both FAR and ORCID to prevent FAR from accessing the users' account.
- Revoke FAR Access: On the Vitas & Biosketches page in FAR, click the checkmark next to Signed in.
-
Revoke ORCID Access: In your ORCID account, select Account settings from the dropdown menu under your name in the upper right-hand corner.
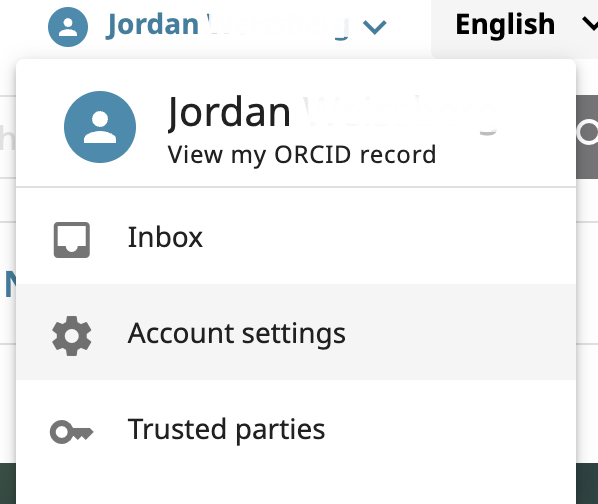
Then click Revoke access under the Trusted Organizations section in the Faculty180 row. You will have to confirm that you would like o Revoke access permissions on the following screen.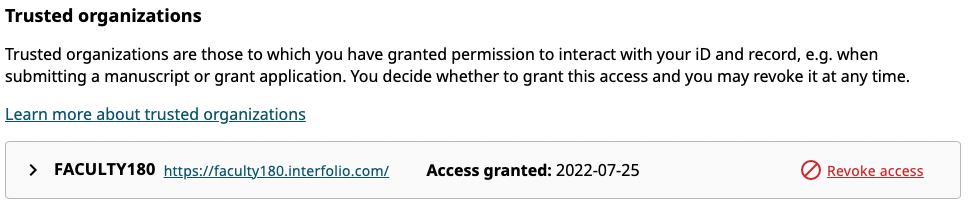
FAR will lose access to your ORCID account until you choose to grant it again.
Import Data from ORCID to FAR
You must grant FAR access to the faculty ORCID profile prior to importing data. The following data can be imported from ORCID to FAR:
-
Works: Maps to Scholarly and Creative Productions
- Volume, Number, Page, and Coauthor will not be included.
- Funding: Maps to Grants
- Affiliations: Maps to Work Experience and Degrees
-
Biography: Maps to Biography.
- Biography is the only field that maps in this section.
- Click Import under the View Profile column in the Vita/Profile Systems section.
Note that duplicate (previously imported) entries are hidden, and thus will not display.
- Select the applicable items (records) to transfer to FAR, then scroll down and click Import Selected
- The records to be imported will display. Update the status, semester, and year as needed, then click Save when finished.
- The Import from the ORCID results will display. The possible upload results are:
- Successfully Added
- Possible Duplicate: possible duplicates can be reviewed under the To Do section of the Dashboard.
- Error: the reason for the error will be displayed
- Exact duplicate: will not be imported.
To get further assistance using the ORCID integration within Interfolio, contact Interfolio-support@elsevier.com or ORCID directly at their website for ORCID-specific questions.
Mapping
For assistance with mapping, clients can request a meeting with their CSM or a consultant if they are receiving errors or if their integration is not functioning properly.