• Products
    • Faculty Search
    • Faculty Activity Reporting
    • Lifecycle Management
    • Review, Promotion & Tenure
    • Dossier
    • Researchfish
  • Training
    • e-Learning
    • Webinars and Office Hours
  • Resources
    • Glossary
    • Interfolio Client Community
    • Interfolio University
    • Technical Resources
    • Announcements, Release Notes, and Known Issues
  • Contact us
  • Log in
  • Products
    • Faculty Search
    • Faculty Activity Reporting
    • Lifecycle Management
    • Review, Promotion & Tenure
    • Dossier
    • Researchfish
  • Training
    • e-Learning
    • Webinars and Office Hours
  • Resources
    • Glossary
    • Interfolio Client Community
    • Interfolio University
    • Technical Resources
    • Announcements, Release Notes, and Known Issues
  • Contact us
  • Log in

How Can We Help?

Search icon

Search Results

Refine by Product
Sorry, we didn't find any relevant articles for you.

Please fill out the contact form below and we will reply as soon as possible.


  • Share
    • Facebook
    • Twitter
    • Linkedin
    • Email
  • Download
Home Faculty Activity Reporting Administrator Data Management
Add/Modify Data After Configuring Sections and Uploading Data
  • Setup

    • Faculty Activity Reporting Welcome Kit
    • Configure Profile Form
    • Configure Upload Form
    • Configure Legacy Vitas - Administrators
    • Configure Activity Data Input Forms
    • Customize Scholarly Outlet Data and Metrics
    • Set Up or Edit the Organizational Structure
    • Set Up Institution Details
    • Set Up Locations and Campuses
    • Set Up Committees
    • Database Clone Request
    • About Dates/Deadlines
    • Create FAR Quicklinks Tool
    • About Account Types and Administrative Access Rights
    • Define Unit Administrative Access Rights
    • Create Custom Input Sections
    • FAR Error Message Glossary
    • Set Up FAQs and Announcements
    • Set Institutional and Personal Vita Template Information and Settings
    • Create Institutional Vita Templates
    • Customize or Reset Branding for all Interfolio Products
    • Locking Controls in FAR
  • Data Management

    • About FAR Integrations
    • About SLAs - Data Migrations/Loads/Other Support
    • About Scholarly Contribution Integrations
    • Integrate ORCID
    • About Autoload Information
    • Clear Faculty Scholarly Duplicates
    • Add/Edit Course Prefixes
    • Add/Edit Courses
    • Add/Edit Courses Taught
    • Bulk Data Uploads
    • Back Up Bulk Data
    • Customize Program/Course Groupings
    • Add/Modify Data After Configuring Sections and Uploading Data
    • Customize Activity Classifications
    • Customize Faculty Classifications
    • Overview of Faculty Classifications
    • About Managing Data in Faculty Classifications
    • Manually Input using Input Faculty Classifications
    • Deactivate a Faculty Classification
    • Edit/Delete an Input Form for Faculty Classifications
    • About Non-Base Data Autoloads
    • Set Up Activity Classifications as Required/Not Required
    • About Forms and Sections
    • Create an Input Form for Faculty Classifications
    • Display Co-Author Role for Scholarly Contributions on Vitas
    • Best Practices Data Integrity
    • FAR Error Message Glossary
    • Restore Leading Zeroes in File Loads
  • People Management

    • Manually Input Faculty Classifications
    • Use Emulate User Tool
    • Use Search Tool
    • Add/Edit Faculty
    • Add/Edit Administrative Rights
    • Create and Manage Support Accounts
    • Manage SSO IDs in FAR
    • Download Faculty ID/Login ID Change Request
    • Update Faculty Classification Directly in Reports
    • About Account Types and Administrative Access Rights
  • Communication

    • Configure Communications with Faculty Users - Administrators
    • Send the Input Form via Communications
    • Set Up FAQs and Announcements
  • Activity Input Periods

    • Initiate Faculty Input Workflow
    • Approve Faculty Input Process
  • Reports

    • Report on Faculty Activity, Administration, and Accreditation
    • Create an Ad Hoc Report
    • Create an Activity Input Report
    • Configure Activities by Activity Classification
    • Configure Activity Overview - by Faculty Report
    • Configure Activity Overview - by Semester Report
    • Configure Course Attachment Report
    • Configure Courses Taught Report
    • Configure Faculty Classification Report
    • Configure Grants Report
    • About NIH Biosketch (2020) Defaults
    • Configure Profile Report
    • Configure Scholarly Activities Report
    • Configure Standard Vita Report
    • About AACSB
    • Configure AACSB Data
    • Verify Data and Request AACSB Reports
    • About AACSB Accreditation Reporting by Request
    • How to Request LCME Accreditation Reporting (LCME Table 4.2-1)
Was this article helpful?
Yes No Give feedback about this article
Add/Modify Data After Configuring Sections and Uploading Data

This article will review how to add/modify data after configuration. From the Upload Form page configure and confirm the file structure of the data in the system


Initial Steps

  1. Configure the Upload Form. Check out our article how to configure the upload form for more information on how to locate and manage the Upload Form configuration.
  2. Create a New Upload with the new configuration. To create a new upload, check out our article Bulk Data Uploads.
 

Note that it is important that all required fields remain; this allows us to identify the existing record that any new data should be tied to.


Add/Modify Data

1. Navigate to Upload Data under Administration

Navigation: Administration > Administration > Upload Data

  1. Click Administration under the Administration section of the navigation menu.
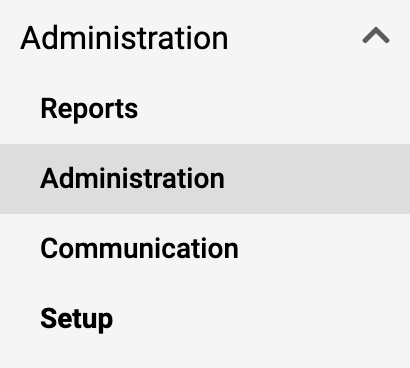
    Navigation bar with Administration highlighted
  2. Click Upload Data under the Bulk Data section.
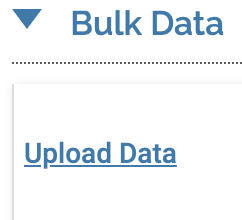
    Bulk Data section with Upload Data underlined

    The Upload Data page will display a list of the 50 most recent previous data loads including the time generated, load type, semester, unit, number added, duplicates, and errors. The listed results can be narrowed down by using the filters at the top of the page.


2. Review dispositions and add/modify data

Navigation: Edit > Choose hyperlinked number

  1. Locate the applicable entry and click the Edit icon (pencil).
    • To help narrow down the list of records displayed, use the filter options (unit, upload type, and/or semester).
    • The list can also be sorted by clicking on the relevant column header.
  1. Click on the hyperlinked number under the Added, Duplicates, or Errors column to review the records for that disposition.

Disposition Types and Available Actions

  1. Added: new records which were uploaded successfully.
    • Options:
      • Download file: Returns a .CSV file of all new entries in the original upload.
      • View: Views the details of a specific records.
  2. Duplicates: duplicate records which already existed in the system. Please note that existing records which which were updated during the upload will still appear under Duplicates and not under Added.
    • Options:
      • Download file: Returns a .CSV file of all duplicate entries in the original upload.
      • Edit: Allows the administrator to make changes to the details of a specific record.
      • Resubmit records: Submits any changes made by the administrator using the Edit function. This allows the administrator to make changes without uploading a new file.
  3. Errors: records which were not able to be added to the system. The cause of the error will be listed in the Reason column, and more details about these error reasons can be found below.
    • Options:
      • Download file: Returns a .CSV file of all entries resulting in an error from the original upload.
      • Edit: Allows the administrator to make changes to the details of a specific record.
      • Resubmit records: Submits any changes made by the administrator using the Edit function. This allows the administrator to make changes and resolve errors without uploading a new file.
      • Delete: Removes the record of the entry and error from the logs. Deleted entries can not be restored or modified in the future, and a new upload will be required if the entry is needed.


Check out the Upload Error Messages chart at the bottom of the Bulk Data Uploads article for more information on the error dispositions.


About Us

  • Products overview
  • Announcements

Additional Support

  • e-Learning
  • Webinars
  • Client Community
  • Interfolio University

Sales

  • Contact Sales Team

Need Help?

  • Contact Us
  • help@interfolio.com

ⓒ 2022 Interfolio, Inc

  • Accessibility Policy
  • Cookie Policy
  • Privacy Policy
  • Terms of Use
  • Log in to Product Help

Submit Support Ticket


0/50 characters


0/50 characters


0/100 characters


Expand