Check out our upcoming webinars and client office hours calendar here!

How Can We Help?

Search icon

Search Results

Faculty Selection Tool

Using the Faculty filter when running an administrative report in FAR allows Administrators to select specific Faculty members (either individually or based on selected filters) to be included in the report.


Use the Faculty Selection Tool

  1. Navigate to Reports under the Administration section of the navigation menu.
    Administration section with Reports highlighted
  2. Select the name of the desired report from the Reports page.
  3. Click the Select Faculty button near the top of the page under the Faculty tile.
  4. Choose desired filters from the Select Faculty window that appears.
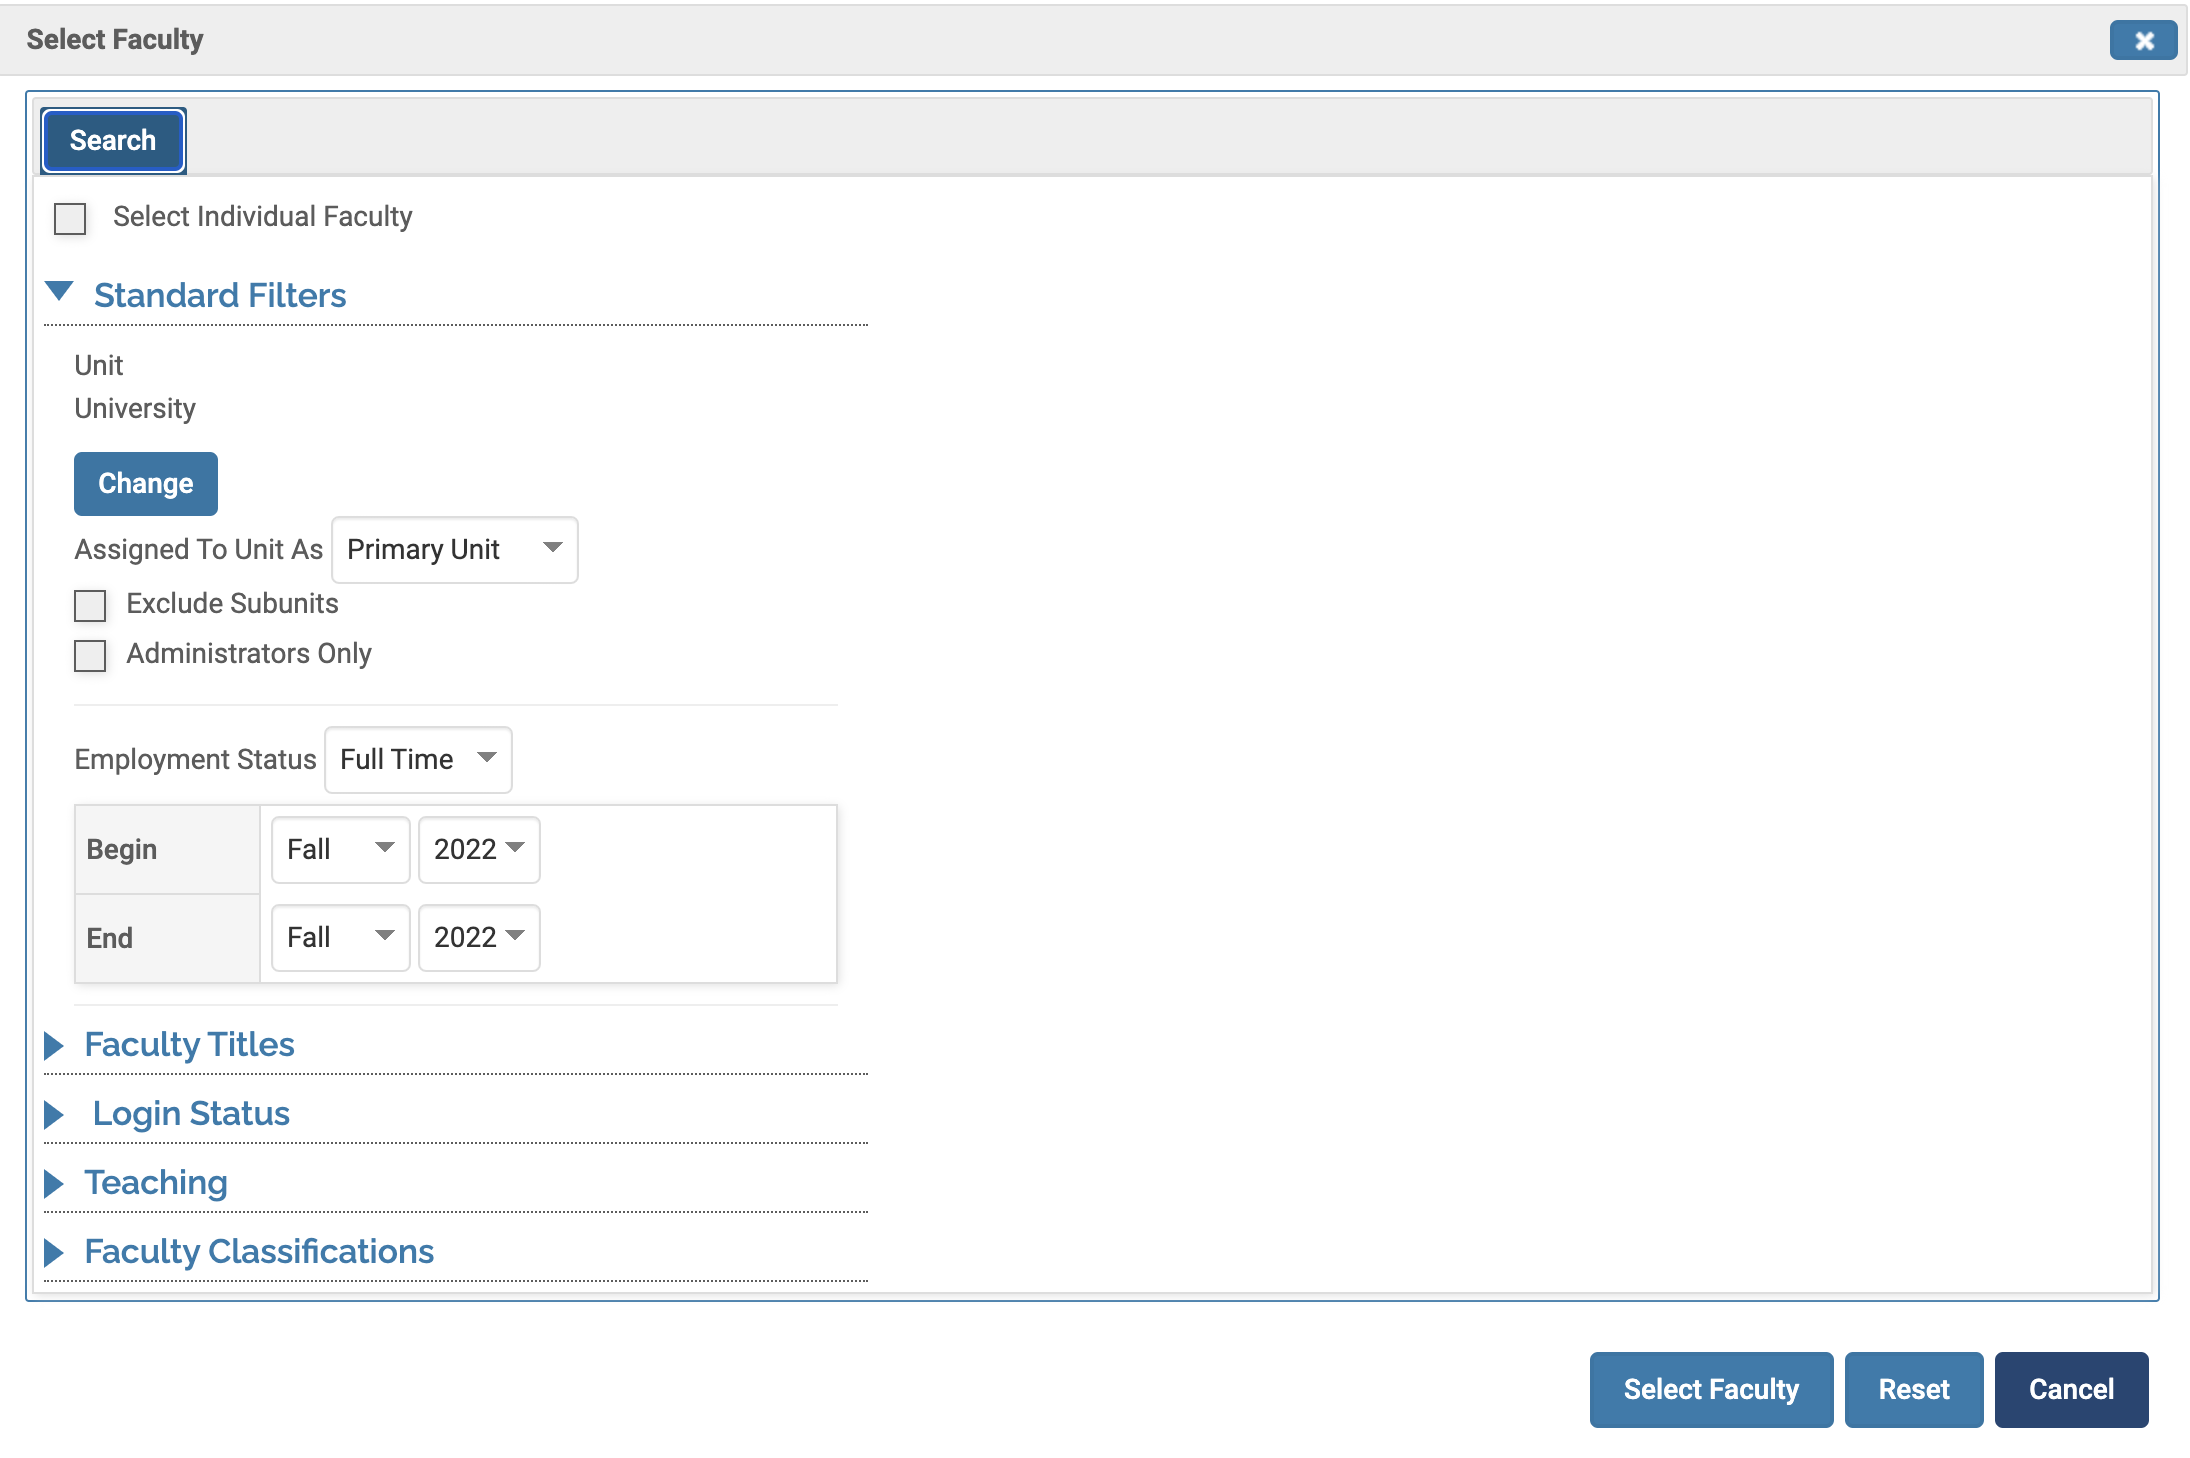
Select Faculty Filters

Filter By… Description
Unit

By default, the unit will be set to the highest unit that you have access to, but it may be helpful to drill down to a specific unit within that hierarchy. The steps below go through this process.


  1. Click the Change button under the selected unit. The list of units available to you will appear.
    1. The + button adjacent to the displayed units will expand to show units at the next level down in the hierarchy.
  2.  Select whether to include faculty assigned to the unit as their Primary unit, Secondary unit, or Both.

    Note that all faculty will have a primary unit assignment, but may not have additional secondary assignments beyond that.

     
  3. Select the Exclude Subunits checkbox if users assigned to units beneath the selected unit in the hierarchy should not be included in the report.
    1. Example
      1. The unit College of Business is selected, which has multiple subunits a level below it in the hierarchy (Accounting, Economics & Finance Department, and Information Systems Department). These subunits may have further subunits beneath them as well.
      2. The filters are set to Primary Only and the Exclude Subunits checkbox is selected.
    2. Result
      1. Only faculty with a primary unit assignment of the College of Business will be included in this report. Faculty at the subunits (Accounting, Economics & Finance Department, and Information Systems Department) will not be included.
      2. Note that if the Exclude Subunits checkbox was not selected in this scenario, then the report would include all faculty with a primary unit assignment of College of Business as well as the units beneath it in the hierarchy.
  4. Select the Administrators Only checkbox if the report should only include faculty members who have been granted Administrator Rights to the selected unit.
Employment Status and/or Faculty Begin/End Term

  1. Use the Employment Status dropdown to filter by a specific employment status. 
    1. Only one status can be selected at a time, but select All Active to include all faculty (other than those with an inactive status) or select All Faculty to include all faculty (active or inactive) at the selected unit.
  2. Use the Begin/End Term dropdown filters to filter faculty by the faculty's begin/end term selected during implementation (or subsequent faculty file uploads).
    1. The Begin/End Term are the same as those used for submitting activity records. Many institutions may use Winter, Spring, Summer, and Fall as their terms, but the number of terms and term labels will depend on the institution's configuration.
    2. The Term filter will default to the current term and cover the last academic year, but both term and year can be adjusted.

The Term filter is helpful if the report is intended to only include current faculty or faculty from previous years.

 
Faculty Titles, Login Status, Teaching, or Faculty Classifications
  1. The Faculty Title filter is a text box that can be used to search for titles used at an institution. Select the relevant title to include only faculty members holding that title in the report.
  2. The Login Status filter allows the report to be filtered by the Active status of the account based on employment status (All Faculty, Inactive, or Active) and login status.
    1. Faculty may have an active account but have never logged in. Alternatively, faculty could have logged in previously but subsequently had their accounts made inactive. Using both of these options together will help limit the faculty members in the report. 
    2. If the Has Logged in Since radio button is selected, a date selector will appear. Once a date is selected, the report will be filtered to only include faculty who logged in on or after the date selected. Records for Faculty who have not logged in within that timeframe will not be included in the report.  
  3. The Teaching section allows you to select whether or not the faculty members in the report have records in the Teaching section

    Note that this only applies if the institution is using the default Teaching section. This filter will not apply to custom sections.

     
  4. The Faculty Classification section allows faculty to be filtered by a variety of faculty classifications. Only faculty classifications that are a Dropdown or Multi-Select Dropdown type will be available to filter on. Faculty Classifications with a Text Box, Large Text Box, or Numeric type will not be available as filters.
Individual Faculty
  1. Select the Select Individual Faculty checkbox at the top of the Select Faculty window. When checked, the window will update to show two containers: Available and Selected

  2. Click the hyperlinked number in the Available container, which will then display three options
    1. Select: This option will move all faculty who are included within the parameters set with the other filters (Unit, Primary/Secondary, Employment Status, etc.) to the Selected container.
    2. List: This option will display the list of all faculty included in the parameters set with the other filters in the Available container. This will allow individual faculty members to be selected, rather than automatically selecting all.

      Information that is displayed in the List view includes Faculty Name (Last Name, First Name), faculty ID number, and faculty email address. The list is displayed in alphabetical order.

       
    3. Cancel: This option will not display the faculty in either container and allow you to continue to adjust your filters as needed. 
  3. If List is selected and it is desired to include all faculty in the Available list in the report, then select the double blue arrow pointing to the right. This will move all faculty from the Available container to the Selected container.
    1. To include only some faculty, click on the desired faculty member(s), then use the single black arrow pointing to the right to add them to the Selected list. 
      • A single user can be moved or multiple can be selected by using command + ctrl and then clicking multiple names.
    2. The same can be done in reverse. If all faculty are in the Selected list, use the double blue arrow pointing to the left to move the entire list back to Available, or the single black arrow pointing to the left to move individual faculty member(s) back to the Available section.

Apply the Filters and Run the Report

  1. Click the Select Faculty button at the bottom of the window once the desired list of Faculty shown is in the Selected container.
  2. The window will automatically close and bring you back to the Report page with the faculty filters saved.
  3. Click the Build Report or Generate Report button (depending on which report is being run) for the report data to populate.
  4. While it is not possible to save individual faculty filter settings, you can save the report as a Quicklink to easily reuse the filters for the selected report again in the future. 
Was this article helpful?
Give feedback about this article