
Create/Manage Ad-Hoc and Standing Committees
Standing committees are created at the unit level (university, school, college) and can be reused for cases within the unit. In contrast, Ad-hoc committees are case-specific and added to workflow steps during case creation or editing. A Unit Administrator or Case Manager must assign members to these committees before initiating the case workflow. Unit Administrators and Case Managers can create, modify, and manage standing committees, including updating memberships, renaming, adding, removing, or recusing individual members, or replacing the committee entirely.
A committee member will not be notified when added to a committee. They will only be notified via email once the case progresses to their designated step in the review process, indicating that it is ready for their review.
Create Committees
Ad Hoc Committee
- Navigate to the Cases page on the navigation menu and click the Name of the desired case to edit.

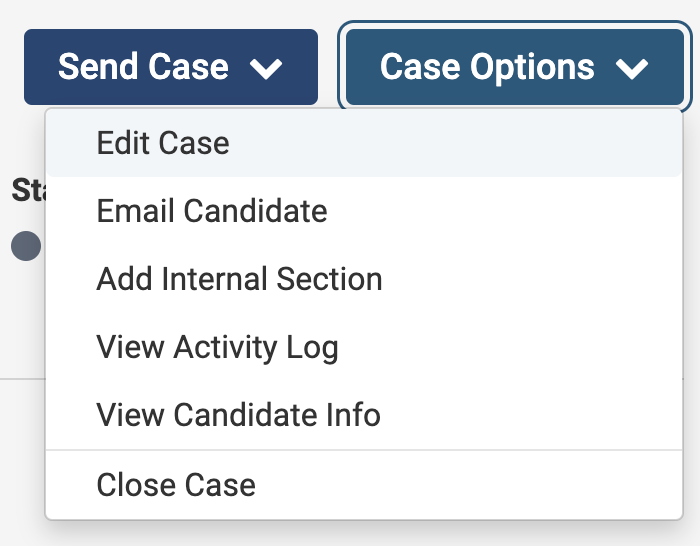
- Select Edit Case under the Case Options dropdown in the upper right hand corner.
- Select Case Review Steps on the Creating a Case toolbar on the right-hand side.

- Click Edit next to the desired step to add the Ad-Hoc Committee, then scroll down to the Reviewers section. Here you can add or recuse committee members, or adjust committee member roles on a case-by-case basis. Selecting the star assigns the user as a Committee Manager.
- The 'Add Members' window will display where you can click the +Add to add an existing user to the committee or the New button in the upper right-hand corner to add new users to RPT and include them directly in the current committee.

- Repeat the process until all committee members are added. Be sure to close the window and save your updates.
Standing Committee
Unlike ad-hoc committees, standing committee membership updates dynamically across all cases where the committee is used.
- Navigate to the Users & Groups page on the navigation menu and then select the Committees tab at the top.

Download Standing Committees List
Click the new Download button at the top of this page to download your standing committees list as an Excel file. This can be helpful for reviewing templates in RPT and preparing for upcoming case creation tasks. This update allows RPT Administrators to view all committee members in one place, including details like committee name, unit affiliation, membership, and email addresses, making it easy to audit committees and prepare for upcoming cases.
- Click +Add Committee in the upper right-hand corner and fill out the 'Add Committee' window that displays.

- Click the Save button to display a list of Committee Members for the selected unit.

If changing the Name or Unit of the committee, be sure the click the 'Update' button to save.
- Search for the user's name to +Add them to the committee as a committee member. Close out of the window when finished.
You can assign a user as a Committee Manager by selecting the star icon next to their name.
- Repeat the process until all committee members are added.
Manage Committees
Most actions, such as adding or recusing committee members, apply only to the specific case in progress. Committee management assignments for Standing Committees are global, impacting all cases using that committee. To restrict committee management to a single case or step, create an Ad Hoc committee and assign the manager role there.
Changes to Standing Committees can be made on either the Users & Groups page or the Case page, not on Templates. Changes on the Case page are temporary, applying only to the current case, while changes on the Users & Groups page are global, affecting all cases using the same committee. Temporary adjustments allow for case-specific modifications without impacting others, while global changes affect all cases linked to the Standing Committee.
The chart below details how to make temporary changes to committee management.
Navigate to the Reviewers section by selecting Cases > Name > Case Options > Edit Case > Case Review Steps > Edit
Be sure to assign the green star to at least one committee member to grant them the ability to move the case forward and upload files. If no one is designated as the committee manager, the committee will be unable to move the case forward or upload recommendation letters, which can cause the case to become 'stuck.'
| Action | Details |
|---|---|
| Add Multiple Committees |
Additional committees can be assigned if multiple committees need access to the packet at the same step. Assigning an individual user grants them Committee Manager permissions, but they cannot collaborate with others, functioning like a one person Ad-Hoc Committee. To enable group collaboration, create a Standing or Ad-Hoc Committee.
Committees cannot view each other's requirements. Therefore, if one committee requires the upload of a letter or the completion of a form, the other committee will not be able to see that requirement or form until it has been submitted. |
| Remove/Replace/Rename Committee |
Unit Administrators and Case Managers in RPT can remove or replace committees or individual reviewers at any Case Review Step, in both templates and active cases. Replacing a committee deletes any submitted required files and form responses from both the case and reports, but retains the existing requirements and instructions for that step. This saves time by eliminating the need to rebuild committee instructions and requirements (such as document uploads or forms) when changing the assigned committee. Note that a primary committee cannot be removed from a step if there is only one committee. At least one committee must be assigned to the Case Review Step at all times. If only one committee is present, it cannot be removed until another committee is added. Select the desired Options from the dropdown. |
| Manage Members (Assign User Roles) |
After adding a user to a committee, you can click the Star icon next to their name to toggle their role: selected for Committee Manager, unselected for Committee Member.
|
| Manage Materials |
All required documents/forms added here will have to be uploaded/answered or bypassed by a Unit Administrator or Case Manger to move the case from the step being edited. Instructions Under the ‘Instructions’ tab, click ‘Edit Instructions’ to add guidance for the specified committee. Check out these article on how to Add Required Documents and Create Required Forms for further details on the 'Required Documents' tab. |
| Manage Settings |
Click Edit Settings under the 'Settings' tab to indicate whether or not the committee can move the case forward and backward.
If this box is checked, it is recommended to recuse Unit Administrators or Case Managers from specific workflow steps in the template if they should not have access to cases at those steps. |


FAQs
Is it possible to add a standing committee from another unit to a case?
Standing Committees can only be added to cases within or below the unit where they were created. Committees from other units will not appear as options when managing a case in a different unit.
Need to add members from another unit?
Consider creating an Ad Hoc Committee. You can manually add those members to the Ad Hoc Committee for the specific case.
Can a standing committee be permanently deleted if it is still listed in a closed case?
No, a standing committee cannot be deleted if it is still associated with the review workflow of any open or closed cases.

To delete a standing committee, it must first be removed from all Case and Template Review Steps in both open and closed cases. To do this:
- Replace the standing committee with a blank Ad Hoc Committee in the review step.
- Remove the standing committee.
- Now you can delete the standing committee from the Committees tab under Users & Groups.
If the case was deleted before the committee was removed from the review step, an engineering ticket will need to be submitted to facilitate the deletion of the standing committee.