

Create Personal Vita Templates
Faculty and Administrators can create and export personal vita templates to showcase academic activities. Faculty can add custom text to institutional templates but cannot modify section settings or styling. Personal vita templates allow faculty to have complete control over the output of their vita, enabling them to tailor formatting and content to best represent their academic work. This article covers how to create personal vita templates to generate vitas.
This article does not cover information on Legacy Vitas.
Create Template
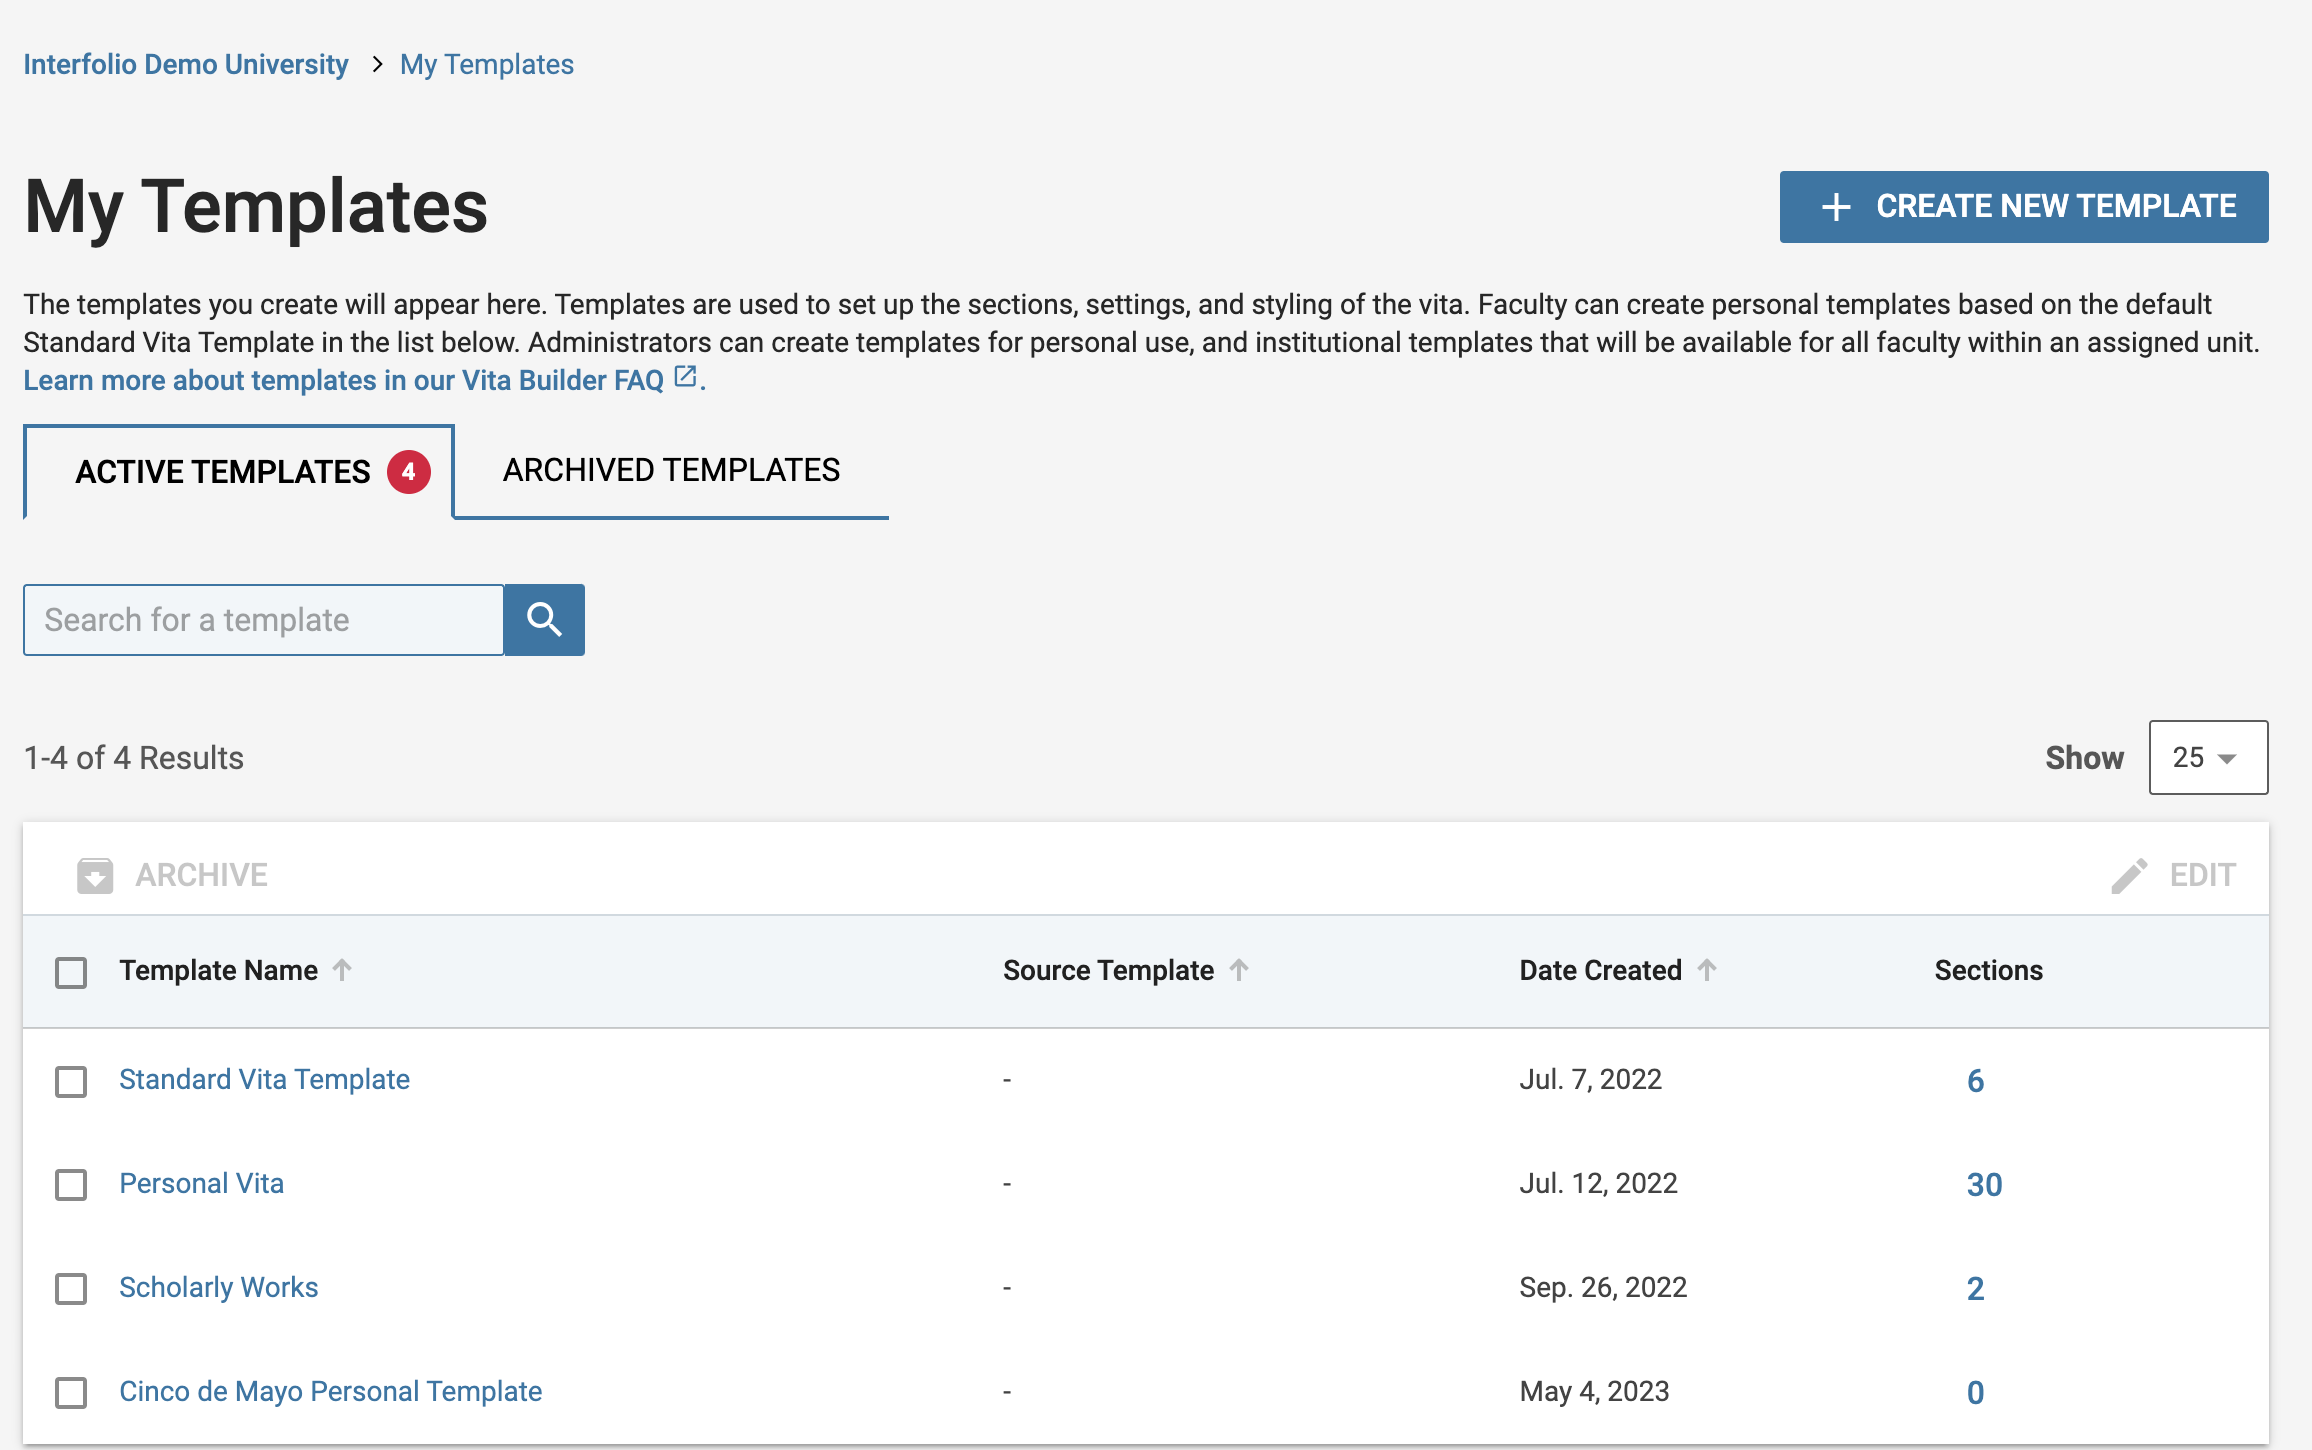
- Navigate to the My Templates page and click the Create New Template button.
- Enter the Source Template Unit details to define the template’s origin.
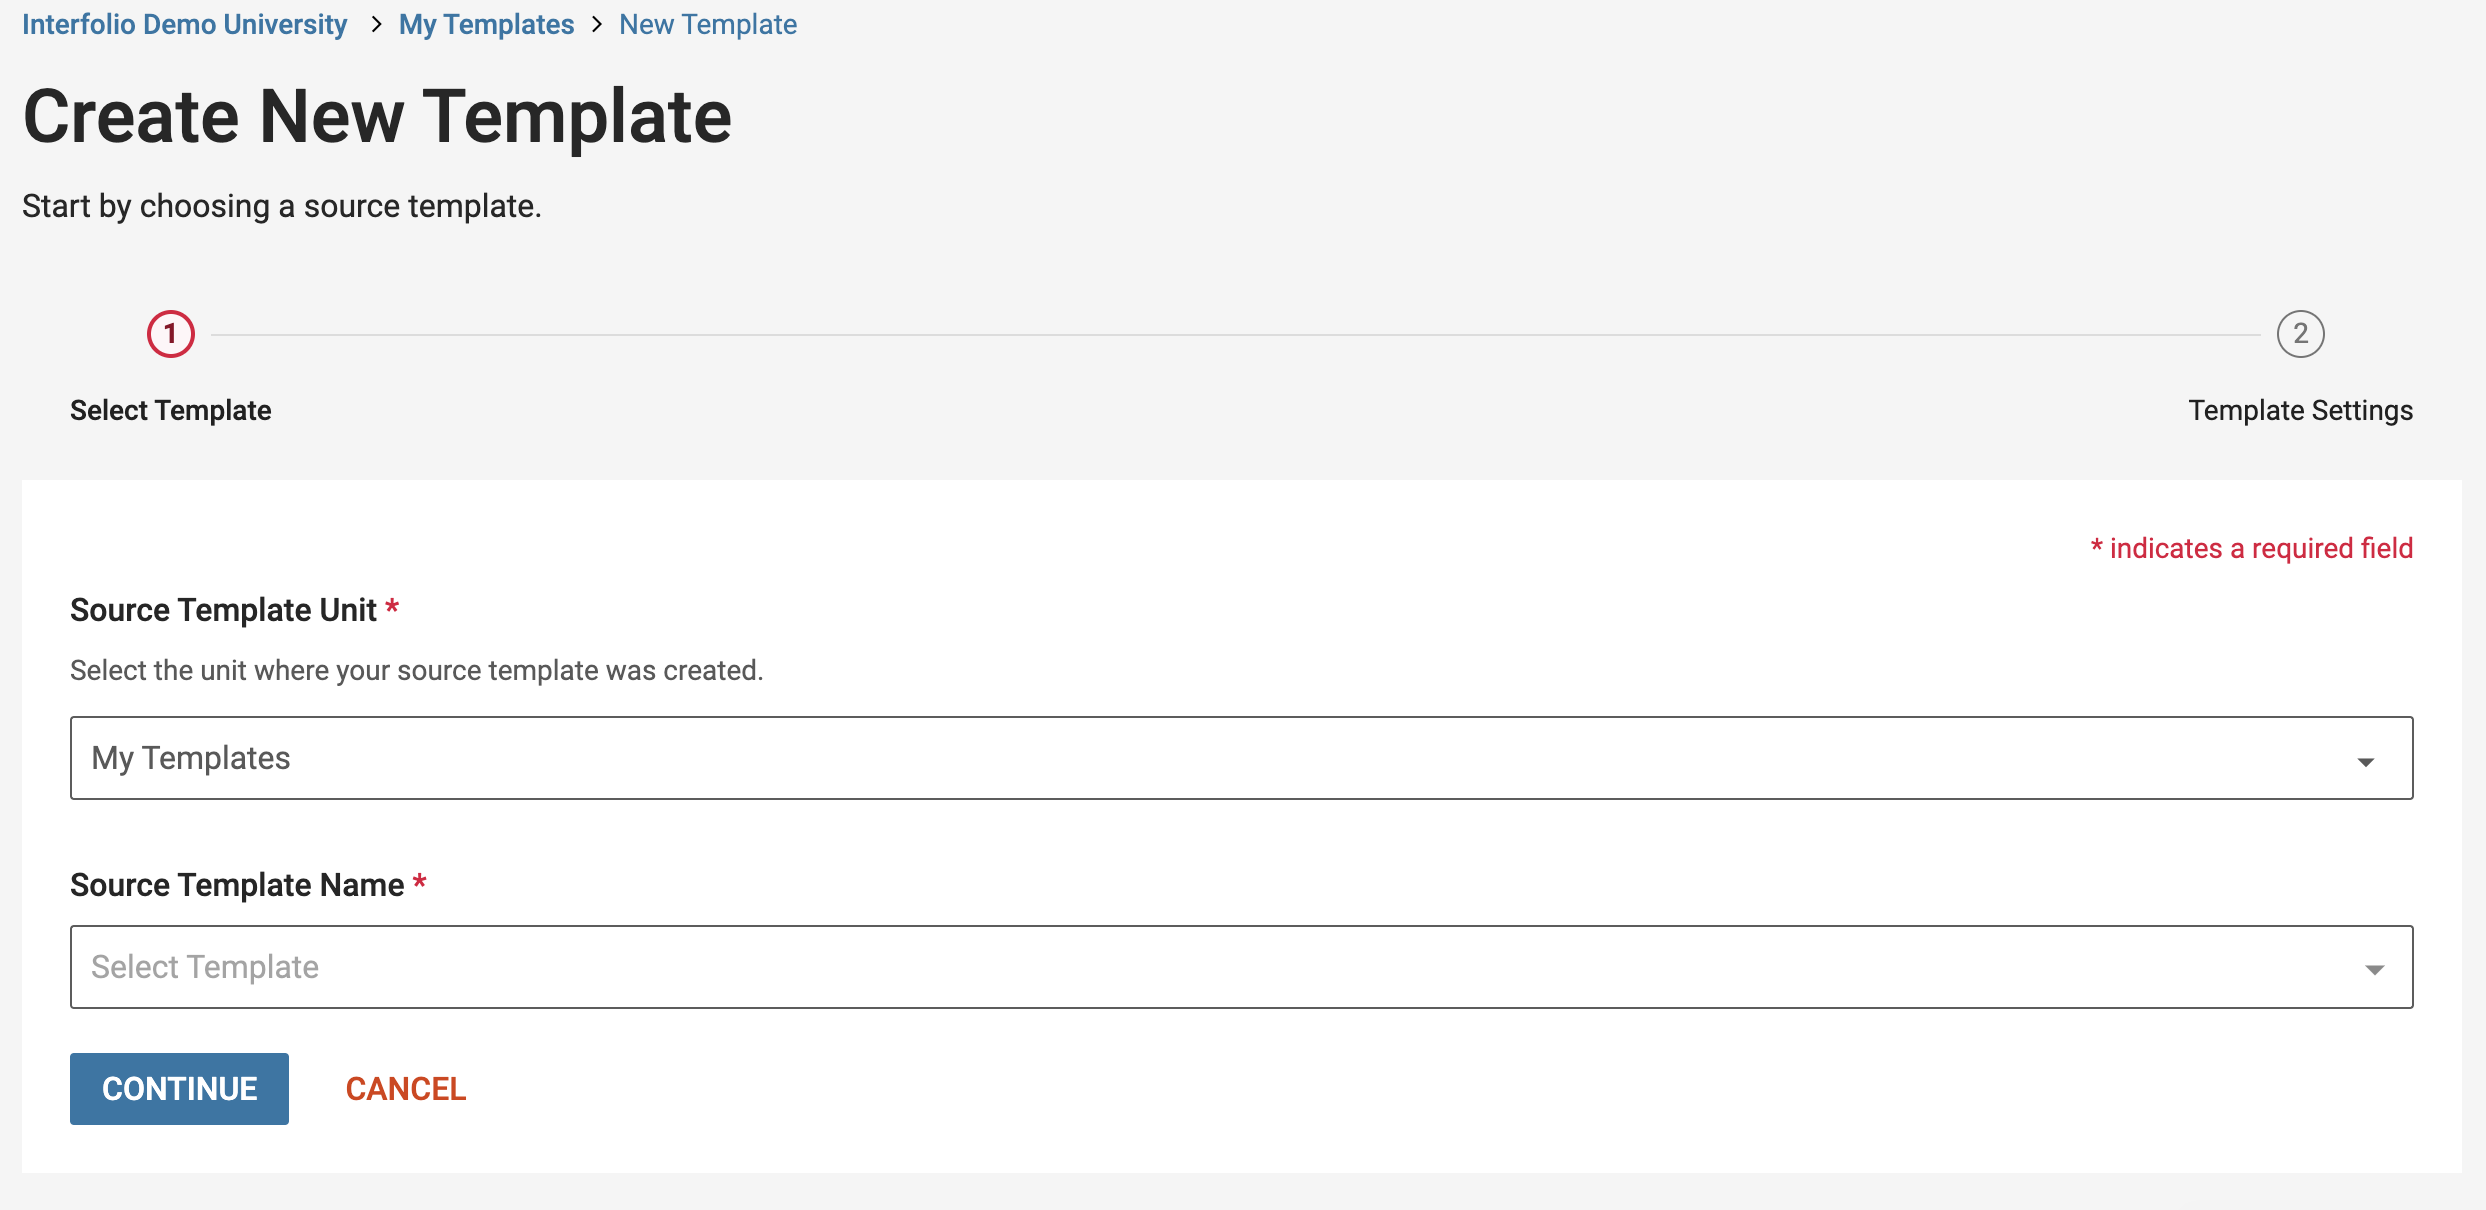
- Click Continue when finished to navigate to the Template Settings page where you’ll enter template details and choose the Display Settings Options.

Faculty-created personal vita templates cannot be shared with other users.
- Click Create Template when finished to navigate to the vita's settings page.

- On this page you can set personal vita template information and settings.